gutenberg
Why You’ll Love This Cherries in the Snow Delight
Let me tell you, if you’re a busy woman like me, juggling family, work, and a million other things, you’ll absolutely adore Cherries in the Snow Delight. This dessert is not just a treat; it’s a lifesaver! With a prep time of only 15 minutes, you can whip it up faster than you can say “What’s for dessert?”
Picture this: you’ve had a long day, and the last thing you want to do is spend hours in the kitchen. But you also want to treat your family to something special. That’s where this creamy, fruity delight comes in. It’s a no-bake dessert, which means minimal fuss and even less cleanup. You can spend more time enjoying your evening instead of scrubbing pots and pans!

And let’s talk about flavors! The combination of cherry pie filling, whipped topping, and crushed pineapple creates a symphony of sweetness that dances on your taste buds. It’s like a summer picnic in your mouth, even if it’s the middle of winter. Plus, the mini marshmallows and shredded coconut add a delightful texture that makes every bite a little adventure.
This dessert is also incredibly versatile. Whether you’re hosting a family gathering, a potluck, or just want to indulge yourself on a quiet evening, Cherries in the Snow Delight fits the bill perfectly. You can serve it in a big bowl for everyone to dig into or portion it out into individual cups for a more elegant touch. Either way, it’s sure to impress!
And let’s not forget about the family-friendly aspect. Kids love it, and let’s be honest, sometimes we need a little help from our little ones to get them to eat their fruits. This dessert is a sneaky way to get them to enjoy cherries and pineapple without them even realizing it. It’s a win-win!
So, if you’re looking for a quick, easy, and delicious dessert that will have everyone asking for seconds, look no further than Cherries in the Snow Delight. Trust me, you’ll be the star of the kitchen, and your family will thank you for it!
Introduction to Cherries in the Snow Delight
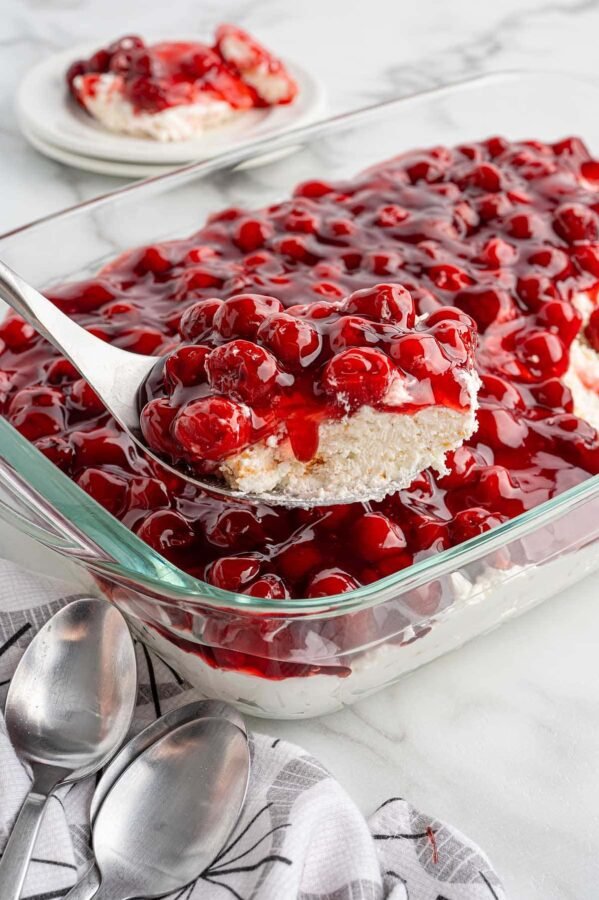
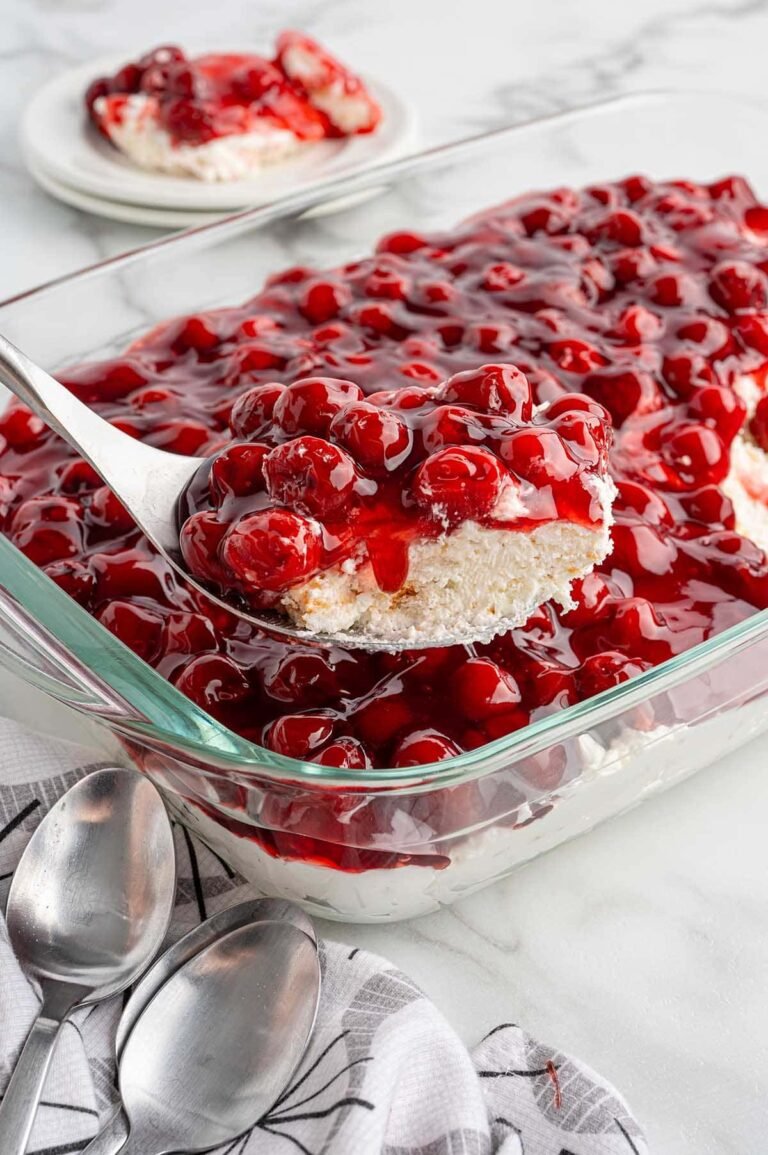
Welcome to the world of Cherries in the Snow Delight! If you’re looking for a dessert that’s as refreshing as a cool breeze on a hot summer day, you’ve just hit the jackpot. This creamy, fruity treat is not only a feast for the eyes but also a delight for the taste buds. Imagine a dessert that combines the sweet tang of cherry pie filling with the lightness of whipped topping, all wrapped up in a fluffy, no-bake concoction. Sounds dreamy, right?
Now, let’s be real for a moment. As busy American women aged 40 to 70, we often find ourselves caught in the whirlwind of daily life. Between work, family commitments, and everything in between, who has the time to spend hours in the kitchen? That’s where Cherries in the Snow Delight comes to the rescue! With just 15 minutes of prep time, you can create a dessert that looks and tastes like you slaved away for hours. It’s like magic, but without the wand!
This dessert is perfect for those moments when you want to impress your family or guests without breaking a sweat. Whether it’s a holiday gathering, a birthday celebration, or just a cozy family dinner, this treat fits right in. Plus, it’s a no-bake recipe, which means you can skip the oven and avoid heating up the kitchen. Who doesn’t love that?
And let’s not forget about the flavors! The combination of cherries, pineapple, and coconut creates a tropical vibe that transports you straight to a sunny beach, even if you’re just sitting at your kitchen table. It’s a delightful escape from the everyday hustle and bustle, and trust me, your taste buds will thank you for it!
So, if you’re ready to dive into a dessert that’s easy to make, bursting with flavor, and sure to please everyone at the table, grab your mixing bowl and let’s get started on this Cherries in the Snow Delight. You’re going to love it!
Ingredients You’ll Need
Now that you’re excited about making Cherries in the Snow Delight, let’s gather our ingredients! This dessert is not only delicious but also super simple to make. Here’s what you’ll need:
- 1 cup cherry pie filling: This is the star of the show! The sweet and tangy cherry pie filling adds that burst of flavor that makes this dessert so delightful. You can also switch it up with other pie fillings like peach or mango for a fun twist!
- 1 cup whipped topping: This fluffy goodness gives our dessert its creamy texture. If you’re looking for a lighter option, feel free to use light whipped topping. It’ll still taste amazing!
- 1 cup mini marshmallows: These little puffs of sweetness add a fun texture and a hint of nostalgia. They remind me of summer campfire nights! If you’re not a fan, you can skip them, but I think they add a nice touch.
- 1 cup crushed pineapple (drained): The crushed pineapple brings a tropical flair to the mix. Make sure to drain it well so your dessert doesn’t get too watery. If you want to cut down on sugar, you can use unsweetened pineapple.
- 1 cup shredded coconut: This ingredient adds a delightful chewiness and a hint of coconut flavor that pairs beautifully with the cherries. If you’re not a coconut lover, you can leave it out or substitute it with crushed graham crackers for a different texture.
- 1/2 cup chopped pecans or walnuts (optional): These nuts add a lovely crunch and a nutty flavor. If you have nut allergies in your family, feel free to skip them or use sunflower seeds instead for that crunch without the nuts.
- 1/2 cup cream cheese (softened): This is what makes our dessert creamy and rich. Make sure it’s softened to room temperature for easy mixing. If you want a lighter version, you can use reduced-fat cream cheese.
- 1/4 cup powdered sugar: This sweetens the cream cheese mixture and helps it blend smoothly. If you’re watching your sugar intake, you can reduce the amount or use a sugar substitute.
- 1 teaspoon vanilla extract: A splash of vanilla adds depth and enhances all the flavors. It’s like the secret ingredient that ties everything together!
With these ingredients, you’re all set to create a dessert that’s not only easy to make but also a crowd-pleaser. Each component plays a vital role in making Cherries in the Snow Delight a creamy, fruity treat that everyone will love. So, let’s get mixing!
How to Make Cherries in the Snow Delight
Alright, my fellow kitchen warriors, it’s time to roll up our sleeves and dive into the fun part—making Cherries in the Snow Delight! This is where the magic happens, and I promise you, it’s as easy as pie (or should I say, as easy as no-bake dessert?). Let’s get started!
Step 1 – Prep Ingredients
First things first, let’s gather all our ingredients and tools. You’ll need:
- A large mixing bowl
- An electric mixer (or a good old-fashioned whisk if you’re feeling strong!)
- A spatula for folding
- Measuring cups for accuracy
- Your serving dish or individual cups for that fancy touch
Once you have everything in one place, it’s time to get mixing! Trust me, having everything ready makes the process smoother than a freshly whipped topping.
Step 2 – Begin Cooking
Now, let’s get to the good stuff! In your large mixing bowl, combine the softened cream cheese, powdered sugar, and vanilla extract. Using your electric mixer, beat these ingredients together until they’re smooth and creamy. You want it to be as fluffy as a cloud, so don’t rush this step!
As you mix, take a moment to enjoy the sweet aroma of vanilla wafting through your kitchen. It’s like a warm hug for your senses! If you’re using a whisk, just put a little elbow grease into it, and you’ll get there.
Step 3 – Combine Ingredients
Once your cream cheese mixture is nice and smooth, it’s time to fold in the whipped topping. Gently add it to the bowl and use your spatula to combine them. You want to be gentle here—think of it as a dance, not a wrestling match!
Now comes the fun part! Add in the cherry pie filling, crushed pineapple, mini marshmallows, shredded coconut, and those optional nuts if you’re using them. Carefully mix everything together until it’s evenly distributed. You want to see those beautiful colors and textures all mingling together like old friends at a reunion.
Step 4 – Finish and Serve
Once everything is mixed, it’s time to transfer your delightful creation to a serving dish or individual cups. I love using clear cups for individual servings because it shows off all those gorgeous layers. Cover your dish with plastic wrap or a lid, and pop it in the refrigerator for at least 2 hours. This chilling time allows the flavors to meld together beautifully, and it helps the dessert firm up a bit.
When you’re ready to serve, take it out of the fridge and give it a little garnish if you like—maybe a dollop of whipped topping or a cherry on top for that extra flair. And there you have it! Your Cherries in the Snow Delight is ready to be devoured. Trust me, it’ll be the star of the show!
Tips for Perfect Results
Now that you’re all set to make Cherries in the Snow Delight, let me share some of my favorite tips to ensure your dessert turns out absolutely perfect every time. These little nuggets of wisdom can make a big difference, especially when you’re in a hurry or just want to impress your family and friends!
1. Use room temperature cream cheese for easier mixing. This is a game-changer! When your cream cheese is at room temperature, it blends much more smoothly with the powdered sugar and vanilla. No one wants lumpy cream cheese in their dessert, right? So, take it out of the fridge about 30 minutes before you start mixing. It’ll save you time and effort, and you’ll end up with a creamy, dreamy texture that’s simply irresistible!
2. Chill the dessert longer for a firmer texture. While the recipe calls for at least 2 hours of chilling, if you can manage to wait a little longer, do it! Letting it sit in the fridge for 4 hours or even overnight allows the flavors to meld beautifully and gives the dessert a firmer texture. It’s like letting a fine wine breathe—trust me, the wait is worth it! Plus, it makes serving easier, especially if you’re using individual cups.
3. Experiment with different pie fillings for unique flavors. One of the best things about Cherries in the Snow Delight is its versatility. While cherry pie filling is a classic choice, don’t be afraid to get creative! Try using peach, blueberry, or even mixed berry pie filling for a fun twist. Each variation brings its own unique flavor profile, and you might just discover a new family favorite. Who knows? You could end up with a whole lineup of delightful desserts that keep everyone guessing!
So, there you have it! With these tips in your back pocket, you’re ready to create a Cherries in the Snow Delight that’s not only delicious but also a showstopper. Happy cooking!
Essential Equipment Needed
Before we dive into making our delightful Cherries in the Snow Delight, let’s make sure we have all the right tools at our fingertips. Having the right equipment can make the process smoother and more enjoyable, especially when you’re juggling a busy schedule. Here’s what you’ll need:
- Mixing bowl: A large mixing bowl is essential for combining all those delicious ingredients. I recommend using a glass or stainless steel bowl, as they’re sturdy and easy to clean. Plus, you can see all the beautiful colors of your mixture as you whip it up!
- Electric mixer: This handy tool will save you time and effort when it comes to beating the cream cheese and powdered sugar together. If you don’t have an electric mixer, a good old-fashioned whisk will do the trick, but be prepared to put in a little elbow grease!
- Spatula: A spatula is perfect for gently folding in the whipped topping and other ingredients. It helps ensure everything is mixed evenly without deflating that lovely whipped cream. Plus, it’s great for scraping down the sides of the bowl to get every last bit of that creamy goodness!
- Serving dish or individual cups: Depending on how you want to present your Cherries in the Snow Delight, you can use a large serving dish for a family-style dessert or individual cups for a more elegant touch. I love using clear cups because they show off the beautiful layers of the dessert, making it even more tempting!
- Measuring cups: Accurate measurements are key to achieving the perfect balance of flavors in your dessert. Make sure you have a set of measuring cups handy for measuring out your ingredients. It’s a small step that can make a big difference in the final result!
With these essential tools in your kitchen arsenal, you’re all set to create a Cherries in the Snow Delight that will wow your family and friends. So, gather your equipment, and let’s get ready to whip up some deliciousness!
Delicious Variations of Cherries in the Snow Delight
Now that you’ve mastered the classic Cherries in the Snow Delight, let’s have some fun with variations! One of the best things about this dessert is its versatility. You can easily switch things up to suit your taste or to impress your guests with something a little different. Here are some delightful variations to consider:
1. Tropical Twist: If you’re dreaming of sandy beaches and sunny skies, why not swap out the cherry pie filling for something a bit more tropical? Mango or peach pie filling can bring a whole new vibe to your dessert. Imagine the sweet, juicy flavors of ripe mangoes or the fragrant essence of peaches mingling with the creamy goodness of whipped topping. It’s like a mini-vacation in a bowl! Just picture serving this at a summer barbecue or a family gathering—it’ll be a hit!
2. Lighter Version: For those of us who are watching our waistlines or just want a lighter treat, you can easily lighten up Cherries in the Snow Delight without sacrificing flavor. Simply use light whipped topping and reduced-fat cream cheese. You’ll still get that creamy texture and delicious taste, but with fewer calories. It’s a great way to indulge without the guilt, and your family will never know the difference!
3. Extra Flavor Boost: Want to take your dessert to the next level? Add a splash of almond extract to the cream cheese mixture. This little addition can elevate the flavor profile and give your Cherries in the Snow Delight a delightful nutty undertone. It’s like adding a secret ingredient that makes everyone wonder what your magic touch is! Just be careful not to overdo it—a little goes a long way!
These variations not only keep things exciting but also allow you to cater to different tastes and dietary preferences. Whether you’re in the mood for something tropical, lighter, or just a bit more flavorful, there’s a version of Cherries in the Snow Delight that’s perfect for you. So, don’t hesitate to get creative and make this dessert your own!
Serving Suggestions
Now that you’ve whipped up your delightful Cherries in the Snow Delight, let’s talk about how to serve it up in style! Presentation can make all the difference, and I’ve got some fun ideas to elevate your dessert experience. After all, we eat with our eyes first, right?
1. Pair with Graham Crackers or Vanilla Wafers: One of my favorite ways to enjoy this creamy treat is by serving it alongside some crunchy graham crackers or vanilla wafers. The contrast between the smooth, fluffy texture of the Cherries in the Snow Delight and the crispiness of the crackers creates a delightful balance. It’s like a party in your mouth! Just imagine dipping a graham cracker into that luscious cherry goodness—heavenly!
Plus, if you have kids around, they’ll love the interactive element of dipping. It’s a fun way to get everyone involved in dessert time, and who doesn’t love a little crunch with their creamy treats?
2. Fresh Fruit or a Scoop of Vanilla Ice Cream: If you’re looking to add a touch of freshness to your dessert, consider serving it with some fresh fruit. Slices of strawberries, blueberries, or even a handful of raspberries can brighten up the plate and add a pop of color. The tartness of the berries complements the sweetness of the Cherries in the Snow Delight beautifully, creating a refreshing contrast that’s perfect for warm days.
And let’s not forget about the classic pairing of vanilla ice cream! A scoop of creamy vanilla ice cream on the side takes this dessert to a whole new level. The cold, creamy ice cream melts slightly when it meets the chilled dessert, creating a dreamy combination that’s simply irresistible. It’s like a match made in dessert heaven!
So, whether you choose to serve your Cherries in the Snow Delight with crunchy graham crackers, fresh fruit, or a scoop of ice cream, you can’t go wrong. These serving suggestions not only enhance the overall experience but also make your dessert feel a little more special. Trust me, your family and friends will be raving about it long after the last bite!
FAQs About Cherries in the Snow Delight
As you embark on your journey to create the delightful Cherries in the Snow Delight, you might have a few questions swirling around in your mind. Don’t worry; I’ve got you covered! Here are some frequently asked questions that can help you navigate this delicious dessert with ease.
Can I make this dessert ahead of time?
Absolutely! One of the best things about Cherries in the Snow Delight is that it can be prepared a day in advance. Just whip it up, cover it well, and store it in the refrigerator. This not only saves you time on the day you plan to serve it, but it also allows the flavors to meld together beautifully. It’s like giving your dessert a little extra time to shine!
Is this dessert suitable for a gluten-free diet?
Yes, indeed! Cherries in the Snow Delight can be made gluten-free with just a little attention to detail. Just ensure that the cherry pie filling and any toppings you use are labeled gluten-free. This way, everyone can enjoy this creamy, fruity treat without any worries. It’s a great way to include friends and family who may have dietary restrictions!
How long can I store leftovers?
If you happen to have any leftovers (which is a big if, because it’s so delicious!), you can store them in the refrigerator for up to 3 days. Just make sure to keep it covered to maintain its freshness. After all, we want every bite to be as delightful as the first! If you find yourself with leftovers, consider serving them as a sweet surprise for breakfast or a late-night snack. Trust me, it’s just as good the next day!
With these FAQs in mind, you’re all set to tackle Cherries in the Snow Delight like a pro! If you have any other questions or need tips along the way, don’t hesitate to reach out. Happy cooking!
Final Thoughts on Cherries in the Snow Delight
As we wrap up our delicious journey through Cherries in the Snow Delight, I can’t help but reflect on just how easy and delightful this recipe truly is. It’s like a breath of fresh air in the world of desserts, especially for us busy women who often find ourselves juggling a million things at once. With just a few simple ingredients and a mere 15 minutes of prep time, you can create a dessert that not only looks stunning but tastes absolutely divine!
What I love most about Cherries in the Snow Delight is its versatility. Whether you’re hosting a family gathering, celebrating a special occasion, or simply treating yourself after a long day, this dessert fits the bill perfectly. It’s a crowd-pleaser that brings smiles to faces and joy to hearts. Imagine serving it at a family reunion, where everyone gathers around the table, sharing stories and laughter, all while indulging in this creamy, fruity treat. It’s those moments that make life so sweet!
And let’s not forget about the simple pleasure of enjoying it at home. Sometimes, we need a little indulgence in our lives, and this dessert is the perfect way to treat yourself without the fuss. Picture yourself on a cozy evening, a spoonful of Cherries in the Snow Delight in hand, as you unwind and savor each bite. It’s a little slice of happiness that you deserve!
So, if you haven’t already, I wholeheartedly encourage you to give this delightful recipe a try. You’ll be amazed at how something so simple can bring so much joy to your table. Plus, your family will be singing your praises, and who doesn’t love a little kitchen fame? Trust me, once you make Cherries in the Snow Delight, it’ll become a staple in your dessert repertoire, and you’ll find yourself making it time and time again.
In the end, it’s all about creating memories and enjoying the little things in life. So grab your mixing bowl, gather your ingredients, and let’s make some magic happen in the kitchen. Here’s to sweet moments and delightful desserts!
“`
Print
Cherries in the Snow Delight: A Creamy, Fruity Treat!
Cherries in the Snow Delight is a creamy, fruity treat that combines cherry pie filling, whipped topping, and a variety of other delicious ingredients for a refreshing dessert.
- Total Time: 2 hours 15 minutes
- Yield: 8 servings 1x
Ingredients
- 1 cup cherry pie filling
- 1 cup whipped topping
- 1 cup mini marshmallows
- 1 cup crushed pineapple, drained
- 1 cup shredded coconut
- 1/2 cup chopped pecans or walnuts (optional)
- 1/2 cup cream cheese, softened
- 1/4 cup powdered sugar
- 1 teaspoon vanilla extract
Instructions
- In a large mixing bowl, combine the softened cream cheese, powdered sugar, and vanilla extract. Beat with an electric mixer until smooth and creamy.
- Gently fold in the whipped topping until well combined.
- Add the cherry pie filling, crushed pineapple, mini marshmallows, shredded coconut, and chopped nuts (if using) to the bowl. Carefully mix until all ingredients are evenly distributed.
- Transfer the mixture to a serving dish or individual cups.
- Cover and refrigerate for at least 2 hours to allow the flavors to meld and the mixture to firm up.
- Serve chilled, garnished with additional whipped topping or cherries if desired.
Notes
- For a tropical twist, substitute the cherry pie filling with mango or peach pie filling.
- To make it lighter, use light whipped topping and reduced-fat cream cheese.
- Prep Time: 15 minutes
- Cook Time: 0 minutes
- Category: Dessert
- Method: No-bake
- Cuisine: American
- Diet: Vegetarian
Nutrition
- Serving Size: 1 serving
- Calories: 180
- Sugar: 10g
- Sodium: 50mg
- Fat: 8g
- Saturated Fat: 4g
- Unsaturated Fat: 2g
- Trans Fat: 0g
- Carbohydrates: 20g
- Fiber: 1g
- Protein: 2g
- Cholesterol: 20mg


